Imagine sliding your hand into a perfectly conditioned, supple baseball mitt right before a big game. There’s something deeply satisfying about the feel of a well-oiled glove that makes every catch smoother and every throw more precise. Oiling your baseball mitt isn’t just about maintaining its look; it’s crucial for enhancing performance and extending its lifespan.
You might think that oiling your mitt is a complex chore reserved for the pros, but it’s actually quite simple and immensely rewarding. With the right techniques and a bit of know-how, you’ll keep your glove game-ready season after season. Let’s dive into why oiling your baseball mitt is essential and how you can do it like a pro.
Materials Needed
Gathering the correct materials ensures a successful oiling of your baseball mitt, enabling the enhancement of both performance and lifespan as previously discussed.
Choosing the Right Oil or Conditioner
Selecting the appropriate oil or conditioner impacts the effectiveness of the maintenance process. Leather conditioner, specifically designed for baseball mitts, provides the nutrients necessary to keep the leather supple without causing damage. Popular options include lanolin-based conditioners and natural oils like neatsfoot or mink oil. Avoid products containing petroleum or silicone, as they can degrade the leather’s quality over time.
Additional Supplies
Gathering necessary additional supplies prepares you for a smooth oiling process. You will need a clean cloth or sponge to apply the conditioner and a small, soft brush to remove any dirt or debris from the mitt’s crevices. Ensure the cloth is lint-free to avoid leaving residue behind. If your mitt is particularly dirty, consider using a mild, leather-friendly soap for a deeper clean before conditioning. Always have a dry towel on hand to wipe off any excess oil or moisture.
Preparing Your Baseball Mitt
Cleaning the Mitt
Begin by removing any dirt or debris from your baseball mitt. Utilize a soft brush to gently scrub the surface. For stubborn stains or dirt, mix a few drops of leather-friendly soap with water and apply this solution sparingly with a clean cloth. Gently rub the areas needing attention, being careful not to saturate the leather as excess moisture can damage it. After cleaning, wipe the mitt with a dry cloth to remove any soap residue and allow it to air dry completely before proceeding with oiling.
Inspecting for Damage
Examine your mitt thoroughly for any signs of wear or damage. Focus on checking the laces and the leather’s surface. Look for cracks, tears, or loose stitching. Repair any minor issues before oiling, as conditioning can worsen existing damage if not addressed. If you find significant damage, consider professional repair to extend the life of your mitt. Regular inspections help maintain your mitt’s condition and ensure optimal performance during use.
The Oiling Process
After preparing and inspecting your baseball mitt, the next step ensures it remains supple and ready for use. Oiling the mitt not only prolongs its life but also enhances its performance, which is vital for any player.
Applying the Oil
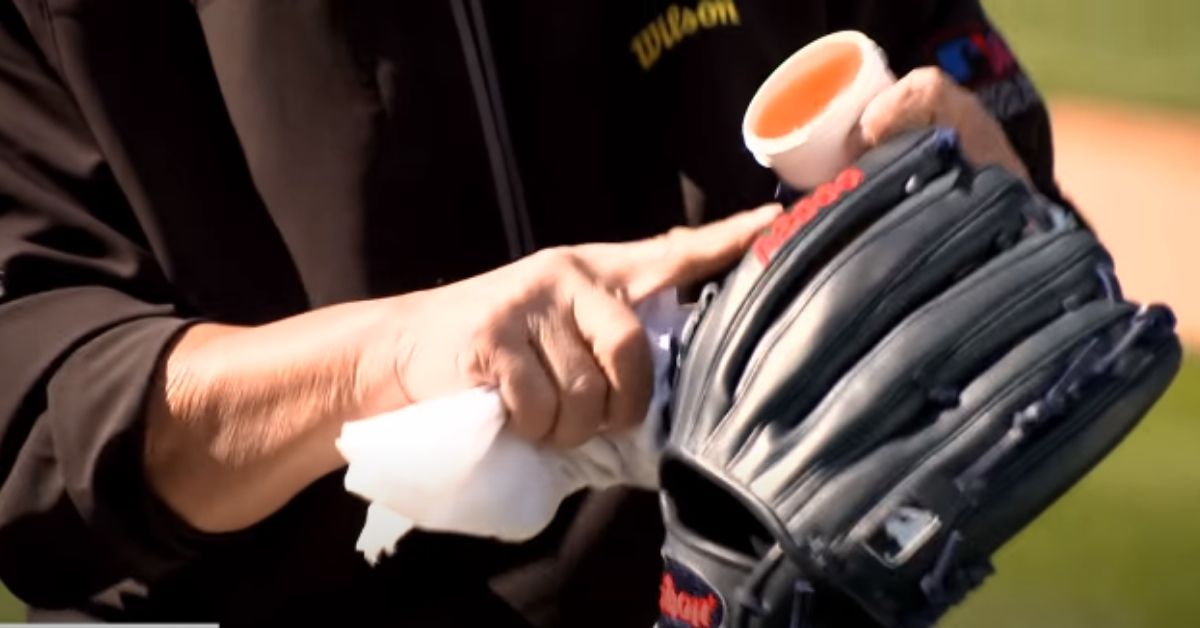
Select a suitable oil for your baseball mitt; options typically include specialized leather conditioners or natural oils like lanolin, neatsfoot, or mink oil. Begin by placing a dime-sized amount of oil onto a clean, soft cloth. Applying too much oil can oversaturate the leather, making it heavy and potentially degrading its quality.
Rub the oil over the entire surface of the cleaned mitt, paying particular attention to the areas between the fingers and the palm, which endure the most wear. Ensure every part of the mitt’s surface gets a light coating. It’s important to apply oil sparingly and avoid any pooling on the leather surface. The right amount ensures the leather does not become overly slick or heavy.
Distributing the Oil Evenly
Once the initial application is done, your next step involves spreading the oil uniformly across the mitt. Work the oil into the leather using small, circular motions with your cloth. This technique helps in penetrating the leather more deeply and evenly.
Focus on the harder-to-reach areas like the crevices and the stitching lines. These areas are crucial as they often experience considerable stress during games and can become brittle or damaged without proper care.
Use your fingers to massage the oil into the laces, as these often get overlooked yet are fundamental to the mitt’s structural integrity. After oiling, let the mitt sit for at least 24 hours in a cool, dry area. This resting period allows the leather to fully absorb the oil, ensuring the mitt remains conditioned and ready for your next game.
Aftercare and Conditioning
After oiling your baseball mitt, proper aftercare and conditioning are critical to extending its life and enhancing its performance.
Wiping Excess Oil
Immediately remove any excess oil after application. Use a clean, dry cloth to gently blot and wipe the mitt’s surface. Focus on areas where oil might accumulate, such as seams and folds. Removing excess oil prevents buildup that can degrade the leather’s quality.
Drying the Mitt
Store your mitt in a cool, dry environment away from direct sunlight. Heat sources and direct sunlight can dry out the leather, causing it to become brittle and crack over time. Allow the mitt to dry naturally for at least 48 hours before using it again. Ensure the storage area is well-ventilated to facilitate even drying and avoid mildew growth.
Breaking in the Mitt
Breaking in your oiled mitt is crucial for optimal performance. Start by gently bending and flexing the glove to soften the leather. Engage in several sessions of catch, focusing on forming the pocket where the ball will rest. For more rigorous shaping, use a mallet to mimic the impact of a baseball, concentrating on the mitt’s pocket and hinge areas. This process helps create a custom fit and enhances comfort during gameplay.
Maintenance Tips
Maintaining your baseball mitt optimally ensures it remains in top shape for games and practice. The following tips guarantee the mitt’s longevity and functionality.
Regular Conditioning Schedule
Establish a consistent conditioning routine for your mitt to keep the leather soft and supple. Condition the mitt every three months, but adjust this frequency based on usage and exposure conditions. Apply a quality leather conditioner; brands like Lexol or Wilson’s Game Ready offer excellent protection and hydration for leather fibers. Spread the conditioner evenly using a soft, clean cloth, working it into the leather in small circular motions. Avoid over-conditioning to prevent the buildup of excess residue that can degrade leather quality.
Storing Your Mitt
Choose a cool, dry place away from direct sunlight to store your mitt. Heat and moisture can deteriorate leather rapidly, so avoid areas like basements or car trunks where temperature and humidity can fluctuate widely. Maintain the mitt’s shape by placing a baseball inside the pocket and wrapping it with a soft strap or a special mitt deformer. This strategy helps keep the mitt’s pocket well-formed and ready for your next game.
Troubleshooting Common Issues
The section addresses common problems encountered when oiling a baseball mitt, offering solutions to ensure your mitt remains in prime condition.
Sticky or Over-Oiled Mitt
If your baseball mitt feels sticky after oiling, effective measures exist for handling the excess. Begin by wiping the surface with a clean, dry cloth to remove superficial oil. Employ a mild leather cleaner for persistent stickiness, applying a small amount with a soft brush to delicately scrub the affected areas. Reinforce mitt maintenance by drying it in a naturally airy environment, avoiding exposure to direct sunlight or heat sources that can exacerbate the issue. Regular care checks ensure the mitt’s integrity and prevent future over-oiling.
Dry and Cracking Leather
Restoring a dry and cracking baseball mitt involves rejuvenating the damaged leather. Start by cleaning the mitt using a gentle, leather-safe cleaner to clear away dirt that can increase leather deterioration. Once clean, apply a leather conditioner specifically formulated for baseball mitts, such as Lexol or Bickmore’s Bick 4, focusing on the dry, cracking areas. Massage the conditioner into the leather in circular motions to promote effective absorption. Allow the mitt to rest in a cool, dry place for at least 24 hours before use. Regular conditioning schedules, maintenance of the mitt’s shape with a baseball stored in the pocket, and avoidance of extreme temperatures help prevent future dryness and cracking.
Conclusion
Proper care of your baseball mitt is essential to both its performance and lifespan. By following the detailed steps outlined—from cleaning to conditioning—you’re setting up your mitt for success on the field. Remember that the key to a well-maintained mitt lies not only in regular oiling but also in the thoughtful aftercare and storage practices you adopt. Embrace the routine of maintenance to ensure your mitt remains game-ready season after season. With the right approach, your glove will continue to be a reliable partner in every catch and play.