Imagine stepping onto the mound, the crowd’s cheers fading into the background as you focus on the catcher’s mitt. Teaching pitching, whether it’s to eager little leaguers or ambitious high schoolers, is about more than just hurling a baseball. It’s about crafting a set of skills, fine-tuning mechanics, and fostering a mental toughness that transforms a thrower into a pitcher.
You might wonder where to start or how to make your coaching sessions both effective and enjoyable. From mastering the basics to advanced techniques, learning how to teach pitching can be as rewarding as it is challenging. Let’s dive into the essentials of pitching mechanics, drills, and mindsets that will help your players not only play but excel on the diamond.
Preparing to Teach Pitching
Teaching pitching begins with solid preparation, focusing on understanding the basics and ensuring safety measures are in place.
Understanding the Basics of Pitching
Grasping the fundamentals of pitching is crucial for effective teaching. Familiarize yourself with the different types of pitches—such as fastballs, curveballs, and sliders—for diverse playing scenarios. Mastery of these can improve how you demonstrate and explain pitching techniques. Begin by discussing the grip, stance, and wind-up phases, which are foundational to executing any pitch effectively. Emphasize the importance of proper body mechanics to prevent injuries and boost performance. Integrate visual aids, like diagrams and videos of professional pitchers, to illustrate these techniques more clearly. This approach aids learners in visualizing the correct movements and understanding the mechanics behind them.
Safety Measures and Precautions
Prioritize safety to prevent injuries while pitching. Start with a thorough warm-up routine, which should include stretching and light throwing. This prepares the body for the more strenuous activity of pitching and is essential to maintaining physical health. Educate on the signs of fatigue and stress, which can lead to overuse injuries. Stress the importance of using appropriate protective gear, such as helmets for batters facing a pitcher, and proper catcher’s gear during practice sessions. Foster an environment where players feel comfortable communicating any physical discomfort. Ensuring these safety protocols will help maintain the health of the pitchers and all participants involved in the training process.
Materials and Tools Required
Equipping yourself properly proves crucial for effective pitching training. This section outlines the necessary materials and tools.
Baseballs
Baseballs serve as the fundamental tool for pitching practice. Use regulation baseballs for realistic training conditions. Typically, high-quality leather baseballs are preferred due, providing better grip and durability. Ensure you have a sufficient quantity, typically around 20-30, to facilitate efficient sessions without frequent interruptions to retrieve balls.
Pitching Mound
A proper pitching mound is vital for simulating real-game conditions. It should match regulatory specifications, featuring a height of 10 inches and a distance of 60 feet 6 inches from home plate for standard baseball. Portable pitching mounds are available and recommended if using a multi-use or temporary training facility. This allows pitchers to develop proper technique relative to positioning and elevation.
Protective Gear
Safety comes first, especially in pitching where the risk of injury is notable. Ensure pitchers wear appropriate protective gear. Key pieces include a helmet for batters during live pitching, padded caps for pitchers, and protective cups. If the training involves younger pitchers, consider additional gear like chest protectors and elbow guards to safeguard against impact injuries. Always inspect gear regularly to ensure it maintains its protective integrity.
Key Pitching Concepts to Teach
After ensuring the use of proper equipment, transitioning into teaching pitching is crucial. This focuses on instilling foundational pitching concepts.
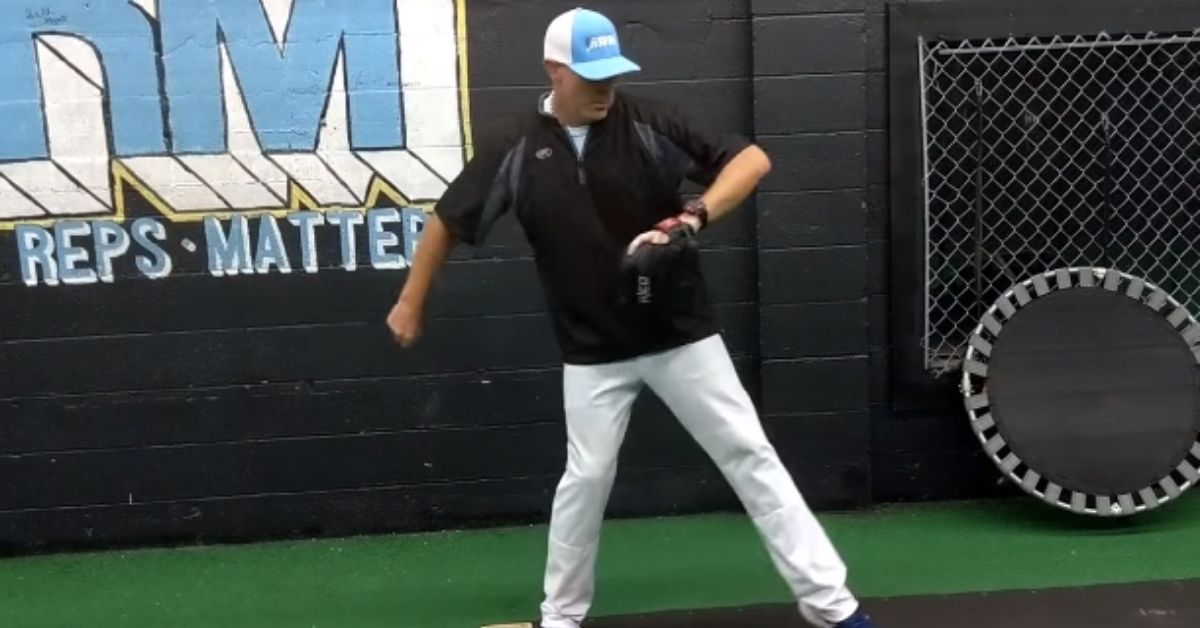
The Mechanics of Pitching
Understanding the mechanics of pitching forms the core of any training program. These mechanics involve a series of movements that a pitcher must master to ensure both effectiveness and safety.
- Stance and Grip: Starting with the basics, ensure your stance is balanced and your grip on the baseball is correct. For a fastball, the thumb and middle fingers should align along the seams.
- Wind-Up: This initial movement builds momentum. It starts with the pitcher standing with feet shoulder-width apart and progresses as the pitcher lifts the leading leg.
- Stride and Release: The pitcher moves the lead leg toward home plate, maintaining body alignment. The release of the ball should happen at the peak of this stride, ensuring maximum velocity and precision.
- Follow-Through: Crucially, teaching the importance of follow-through helps in reducing the risk of injury. It involves the pitcher continuing the motion, even after the ball is released, which aids in dissipating energy efficiently.
Each step needs repetition and detailed observation to correct minor flaws, which can significantly impact the overall effectiveness of the pitch. Training should emphasize the fluidity of motion, combining all aspects of pitching mechanics cohesively.
Explaining the Windup and Delivery
Continuing from the concepts of stance and grip, focus now shifts to the dynamics of the windup and the delivery. Each segment plays a crucial role in the power and accuracy of a pitch.
The Windup
Initiate the windup with a controlled, deliberate motion. Stand on the mound with your feet shoulder-width apart, facing the catcher. Bring your hands together in front of your body, around the chest area, and begin raising them as you pivot your back foot. This motion accumulates energy that propels the entire body into the delivery phase. Keep your eyes fixed on the target, maintaining concentration and balance. Coaches emphasize the importance of a consistent windup, as variations can lead to less control over the pitch.
The Stride and Proposal
Advance from the windup to the stride by lifting your lead leg. This leg, usually opposite to your throwing arm, should rise while keeping the knee bent to maintain balance. As you stride towards home plate, ensure that your leg moves directly towards the catcher to maintain alignment. Begin your arm’s descent simultaneously; the timing of this motion is critical for maximizing velocity. Release the ball at the peak of your forward motion, aiming to snap your wrist down and through the ball as you complete your throw. Continue the motion after the release, allowing your arm to follow through naturally, which aids in reducing stress on the arm. Coaches recommend practicing these steps repeatedly to gain muscle memory and ensure each pitch flows smoothly into the next.
Follow-Through and Recovery
Perfecting your follow-through is crucial for enhancing pitch power and reducing the risk of injury. A correct follow-through ensures that momentum generated during the pitch is controlled and energy is efficiently transferred.
Assess Your Follow-Through Mechanics
Monitor your arm and body position after each pitch. Your throwing arm should naturally continue its motion downward and across the opposite hip, completing the pitch cycle. Your foot on the pitching side must rotate, allowing your hips to fully open, thereby maximizing the pitch’s force. Guarantee these mechanics are consistent to promote muscle stability and pitching efficacy.
Implement Recovery Techniques
Incorporate recovery routines into your training to maintain peak performance. Effective recovery fosters muscle rejuvenation and helps prevent injuries, which often afflict pitchers due to repetitive strain. Stretching and cooling down after pitching are vital; focus on dynamic stretches for the shoulder, back, and legs—examples include leg swings, arm circles, and torso twists. Additionally, integrate rest days into your training schedule. This practice not only aids physical recovery but also contributes to mental preparedness and focus.
Mastering follow-through and incorporating recovery strategies, you ensure the longevity of your pitching career and enhance your effectiveness on the mound. Regularly revisit these techniques as part of your training regimen to remain at your best.
Conducting the First Pitching Lesson
Initiating the first pitching lesson sets the foundation for future success. Focus on establishing a routine that reinforces the basics discussed previously like stance, grip, and motion control.
Warm-up Exercises
Prioritize warm-up exercises to prevent injuries and enhance athletic performance. Begin each session with at least 10 minutes of dynamic stretching. Example exercises include arm circles, wrist stretches, and shoulder rotations which specifically prepare the joints and muscles involved in pitching. Incorporate jogging or quick side shuffles to increase heart rate and blood flow to muscles.
Basic Drials to Start With
Start with fundamental pitching drills that emphasize stance, grip, and the basic pitching motion. Teach the “Tee Drill” where pitchers practice their wind-up and throw from a stationary position to focus on form and balance without the ball. Follow with the “Knee Drill” which helps in understanding the mechanics of the pitch by having the athletes pitch from one knee, aiding in the development of upper body and arm strength.
Each drill lasts about 5 to 10 minutes and requires repeated practice for mastering each technique. Ensure consistency in execution to aid in developing muscle memory, vital for effective pitching.
Advanced Pitching Techniques
Once pitchers master the fundamental skills, advancing their capabilities involves incorporating a range of pitches. This section explores teaching advanced pitching techniques to refine a pitcher’s skill set and improve their game effectiveness.
Teaching Different Types of Pitches
Expanding your repertoire of pitches enhances your ability to challenge hitters effectively. Understand the mechanics behind each pitch to instruct them accurately.
- Curveball: This pitch requires a downward wrist snap at the point of release. If the pitcher wishes to throw a curveball, they position the grip along the baseball’s seams, generating spin by turning their wrist and forearm inward.
- Slider: For a slider, help pitchers grasp maintaining firm wrist control. The pitcher grips the ball off-center, ensuring the thumb and middle finger form a backward “C.” The technique involves a lateral wrist tilt rather than the full wrist turn used in curveballs.
- Changeup: Emphasize the deceiving nature of a changeup, focusing on grip and arm speed. The pitcher holds the ball deep in the hand, loosening the grip to reduce velocity. The key lies in maintaining arm speed similar to a fastball; hence, the hitter perceives it as a faster pitch until the moment of surprise when it crosses the plate slower.
- Knuckleball: Teaching the knuckleball involves perfecting a fingertip grip where the ball rests on the pitcher’s fingernails, minimizing spin. This pitch floats unpredictably, making it challenging for hitters and requires pitchers to practice extensively to gain consistency.
Effective instruction in these pitches relies on detailed feedback on their execution during practice sessions. Use drills that isolate the mechanical aspects of each pitch to help pitchers gain the nuanced control required. Keeping a sharp focus on the biomechanics and variations in release points ensures the pitcher refines these advanced techniques successfully.
Developing Control and Accuracy
Improving your control and accuracy in pitching comes from focused practice and adopting specific techniques. This will build on the foundational skills of stance, grip, wind-up, stride, release, and follow-through. As you move toward teaching more advanced pitches, emphasizing control and accuracy ensures your pitches not only reach their targets but do so with the intended effect.
Establish a Consistent Mechanism
- Align your body correctly: Adjust your body to ensure your shoulders and hips are aligned toward home plate, which improves your general pitching accuracy. Consistent body alignment before every pitch reinforces control.
- Focus on your grip: Each type of pitch requires a distinct grip that directly influences ball spin and trajectory. For instance, a tighter grip on a slider reduces speed but increases spin, affecting accuracy.
Repeat Precise Drilling
- Conduct targeted pitching drills: Engage in exercises that focus on specific aspects of pitching accuracy. One effective drill is the “bullseye” practice where you aim at a small target from various distances to sharpen your precision.
- Utilize video analysis: Record your pitching sessions and analyze them to identify inconsistencies in your motion or technique. This visual feedback helps refine movements for better accuracy.
- Incorporate real-time coaching feedback: Use immediate insights during practice sessions to adjust techniques on the spot if a pitch deviates from the intended path or result.
- Set measurable goals: Define clear, attainable objectives for each practice session, such as hitting the strike zone’s corners 20 times, to gauge improvements in control and accuracy.
Focusing on these structured steps, you can significantly enhance your pitching control and accuracy. Each session builds upon previous learnings from basic mechanics to advanced pitch types, ensuring both robust development and a deeper understanding of pitching dynamics.
Common Issues and Troubleshooting
In the journey to refine pitching skills, encountering technical issues and injuries is common. This section provides effective strategies for adjusting technique errors and managing common injuries, ensuring a smoother and safer pitching development process.
Adjusting Technique Errors
Identifying and correcting technique errors early promotes pitching efficiency and prevents the onset of bad habits. Focus on a few key areas:
- Revisit the Basics: Return to fundamental posture and grip adjustments if inconsistencies arise in your pitching. Comparisons with video footage from past effective pitches can reveal deviations needing correction.
- Increase Feedback Frequency: Integrate more frequent coaching feedback during practice sessions. Immediate correction of errors, such as improper footing or incorrect arm positioning, enhances muscle memory adjusted towards ideal pitching mechanics.
- Utilize Technology: Employ swing analysis tools and high-speed cameras to obtain precise feedback on your pitching mechanics. These tools help pinpoint subtleties that might go unnoticed otherwise.
Dealing with Common Injuries
Prevention and timely response are crucial when addressing injuries related to pitching. Here’s how you can handle the most common ones:
- Shoulder Impingement: Often arises from repetitive use. Implementing routine shoulder-strengthening exercises, such as resistance band workouts and light dumbbell presses, supports injury prevention. If symptoms appear, rest and consult a sports therapist for appropriate rehabilitation activities.
- Elbow Strain: Commonly caused by overuse and incorrect pitch throwing techniques. To prevent this, ensure proper warm-up and cool-down routines are followed, focusing on flexibility and joint health. When pain occurs, reducing the intensity and volume of pitching sessions helps facilitate recovery, alongside icing and anti-inflammatory treatments if advised by a health professional.
- Wrist Tendonitis: This injury can develop from incorrect grip or overuse. Strengthening and stretching exercises targeted at the wrist can prevent tendonitis. If discomfort persists, applying ice and reducing wrist-involved activities are recommended until improvement occurs.
By addressing these common issues proactively, you enhance your ability to teach pitching effectively while minimizing setbacks caused courses, ensuring a healthier, more effective progression in your students’ pitching capabilities.
Monitoring Progress and Providing Feedback
As your students develop their pitching skills, monitoring their progress and offering tailored feedback become crucial steps in the coaching process. This part of your coaching ensures your students fine-tune their abilities and consistently meet their pitching goals.
Setting Goals
Establishing clear, achievable goals is essential for tracking progress in pitching. Goals provide a benchmark that helps both the coach and the pitcher understand where they are and what needs to be improved. Create goals that are specific, measurable, attainable, relevant, and time-bound (SMART). For a pitcher, these goals might include increasing pitch speed from 70 mph to 75 mph over three months or reducing the number of walks in a game by half during the season.
Regular Assessment and Adjustments
Assessment involves observing and measuring a pitcher’s performance against the set goals regularly. You might utilize tools such as high-speed cameras to analyze the mechanics or radar guns to measure pitch speed. These assessments should occur at least once every two weeks to ensure the pitchers remain on track and any deviations from expected progress can be addressed swiftly.
Adjustments are necessary when a pitcher is either not meeting their goals or when they could push beyond their current targets. Adjusting might involve changing a parameter in their physical training, modifying their pitching technique, or focusing on mental conditioning. Regular feedback sessions help in discussing these assessments and making immediate adjustments, ensuring continuous improvement and motivation.
By using these techniques for setting goals and assessing progress you will see marked improvements in the pitching skills of your students, leading to better performance and more wins.
Encouraging Continuous Improvement
Continuous improvement in pitching hinges not only on practice but also on fostering motivation and leveraging the right resources. This section delves into essential strategies to build confidence and provide valuable learning tools.
Motivation and Confidence Building
Building motivation and confidence forms the foundation for enhancing a pitcher’s skills. Set achievable targets to keep pitchers engaged and feeling successful after meeting each milestone. Implement a progress chart to visualize improvements in various aspects like speed, accuracy, and technique over time. Celebrate small victories; recognitions, such as pitcher of the week, can significantly boost morale. Structure practice sessions that end with a successful pitch, ensuring each athlete leaves on a high note. These tactics not only improve skill but also instill a persistent drive in your pitchers.
Providing Resources for Further Learning
Offering various resources plays a critical part in a pitcher’s continuous improvement. Recommend books and videos that detail techniques and strategies. Experts such as Tom House and Chris O’Leary author insightful texts on the mechanics and mental aspects of pitching. Integrate technology by encouraging the use of apps like Coach’s Eye and Hudl Technique, which allow pitchers to analyze their mechanics in slow motion and compare their form against model standards. Organize workshops and clinics with professional players or coaches to provide live feedback and specialized knowledge that reinforces learning far beyond regular practice sessions.
Conclusion
Teaching pitching effectively requires a blend of technical skill development, strategic practice, and motivational support. By focusing on the fundamentals of pitching and incorporating advanced techniques and tools, you’re setting your pitchers up for success. Remember, the key to enhancing their performance lies in consistent practice, precise goal-setting, and ongoing encouragement. Embrace the journey of coaching with patience and persistence and watch as your pitchers achieve their full potential on the mound.