Breaking in your new baseball glove can be as exciting as stepping onto the field for the first game of the season. But before you can make those game-saving catches, it’s essential to condition your glove properly to ensure it’s game-ready. Whether you’ve just picked up a brand-new mitt or you’re looking to revive an old favorite, understanding the right way to condition your glove can make all the difference.
Conditioning not only helps soften the leather, making it more flexible, but it also protects your investment for seasons to come. You’ll find that a well-conditioned glove fits better and feels more comfortable, enhancing your overall performance. Let’s dive into the basics of how to get your glove in top shape, ensuring you’re fully prepared to take the field with confidence.
Gathering Your Materials
Before diving into the conditioning process, ensure you have all necessary materials on hand. This preparation guarantees an effective and efficient conditioning experience.
Choosing the Right Conditioning Oil or Cream
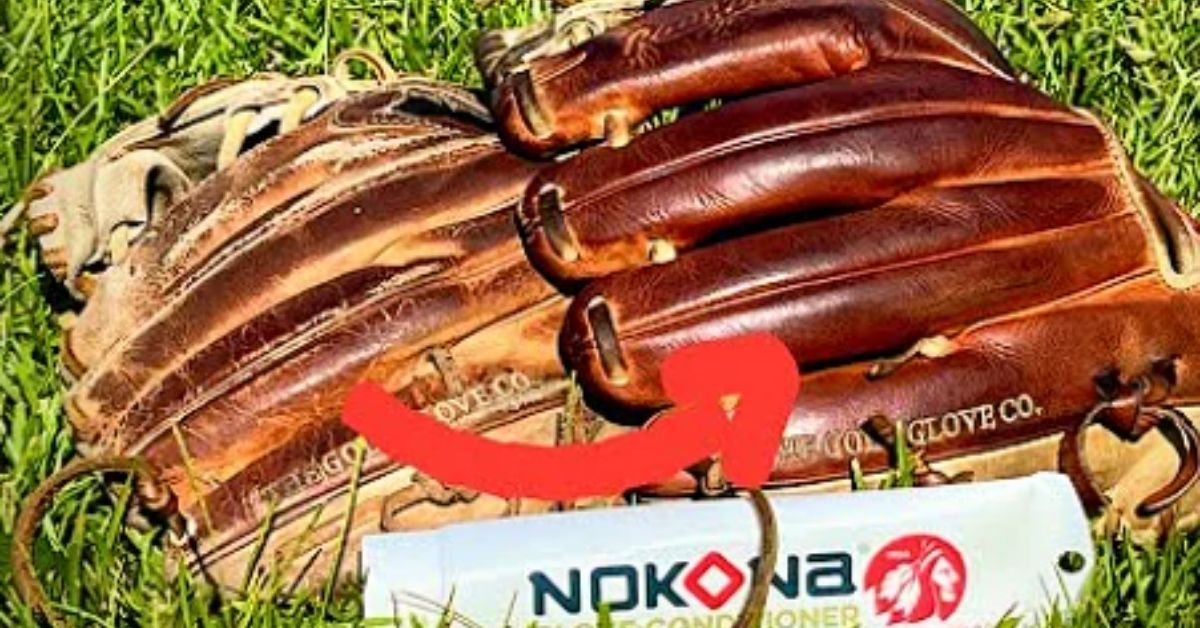
Selecting the appropriate conditioning oil or cream plays a pivotal role in the success of conditioning your baseball glove. Opt for products specifically designed for leather care. Popular choices include lanolin-based creams and mink oil. Lanolin-based creams offer excellent softening properties without compromising the leather’s integrity. Meanwhile, mink oil not only softens but also provides a water-resistant barrier, making it a suitable option if you often play in moist conditions.
Additional Tools Needed
In addition to the conditioning oil or cream, a few other tools will assist in the application process. Gather a soft cloth or sponge to apply the product evenly across the glove. For reaching tight areas, such as the lacing, a small paintbrush or toothbrush proves ideal. Consider having a clean rag at hand to wipe off any excess oil and keep the glove clean during the process. This approach ensures a thorough application and helps maintain the glove’s condition over time.
Initial Cleaning of the Glove
Starting with a clean glove ensures the effectiveness of conditioning. Initial cleaning removes impurities that affect the conditioning oil’s absorption.
Removing Surface Dirt
Begin the cleaning process by lightly brushing off any loose dirt or debris from your glove. Utilize a soft-bristled brush designed for leather materials. Focus on creases where dirt often accumulates. If you spot sand or dried mud, gently scrub these areas to avoid embedding particles deeper into the leather. Perform this step with care to protect the integrity of the leather.
Wiping Down the Glove
After removing surface dirt, prepare a solution of mild soap and lukewarm water. Dip a soft, clean cloth into the soapy water, wring it out to ensure it is damp, not wet, and wipe down the entire surface of the glove. Start from the thumb and gradually move towards the fingers and palm, ensuring each section is attended to. Avoid using excess water, which can saturate and potentially damage the leather. Once the wiping is complete, use another dry cloth to gently dab and remove any moisture remaining on the glove. This step not only cleans but also prepares the leather for a thorough conditioning.
Applying the Conditioner
After cleaning your baseball glove, the next essential step is applying the conditioner. This process crucially affects the glove’s flexibility and longevity.
How Much Conditioner to Use
Begin by applying a small amount, approximately a dime-sized portion, of conditioner to your baseball glove. Too much conditioner can oversaturate the leather, whereas a minimal amount ensures the material remains light and breathable. Adjust the amount depending on your glove’s size and leather dryness, but always start with less to maintain control over the conditioning process.
Techniques for Spreading the Conditioner Evenly
To distribute the conditioner evenly across your baseball glove, use a soft cloth or sponge. Start at the thumb and then move towards the fingers, palm, and backside of the glove:
- Rub the conditioner in small, circular motions to promote even absorption.
- Focus on one section at a time to ensure thorough coverage.
- Avoid using forceful strokes as these might push the conditioner too deeply into the leather, which could harm its structure.
Ensuring All Areas are Covered
Ensuring full coverage of the conditioner is vital for the glove’s overall health and performance. Make sure you reach into all the creases and folds:
- Pay special attention to the lacing areas and the spaces between the fingers.
- Flex the glove gently to expose hidden parts of the leather.
- Check under straps and around any logos or patches, as these areas often get overlooked.
Proper application guarantees that every part of your baseball glove receives the necessary nourishment and protection, setting the stage for optimum performance and increased durability.
Working the Conditioner into the Glove
After selecting the appropriate conditioner and cleaning your baseball glove, the next vital step involves working the conditioner into the glove to enhance its flexibility and durability.
Using Circular Motions
Apply the conditioner using circular motions to promote even absorption into the leather. Start at the palm and work your way out to the fingers and thumb. This technique helps to penetrate the leather more effectively, ensuring that every fiber is conditioned. Maintain a light pressure to prevent over-saturation, which might weigh down the leather instead of softening it.
Paying Attention to the Laces and Hard-to-Reach Areas
Focus on the laces and areas that are tough to reach, like the creases between the fingers and the base where lacing converges. These areas often harbor dirt and moisture, which can degrade the material more rapidly than other parts. Apply a small amount of conditioner with a cotton swab or a small brush, ensuring every segment of lace gets treated. This prevents cracking and breaking, thereby extending the life of your glove.
- Start Small: Begin with a dime-sized amount of conditioner to avoid over-application. Extra conditioner can always be added, but removing excess is more challenging.
- Use a Cloth: Instead of applying directly with your fingers, use a soft, lint-free cloth to control the amount of conditioner spread on the glove.
- Check Consistency: Periodically, inspect the glove for any dry spots. If found, gently work in a small additional amount of conditioner.
Using the right techniques ensures uniform coverage and absorption, therefore maximizing the effectiveness of the conditioning process. Remember, patience and attention to detail will yield the best results in keeping your glove in top playing condition.
Allowing the Glove to Absorb the Conditioner
Once you’ve evenly applied conditioner to your baseball glove, the next step involves ensuring the glove properly absorbs this conditioner.
Ideal Conditions for Setting
Setting the glove in a warm, dry environment optimizes absorption. Exposure to excessive heat or direct sunlight, however, can damage the leather, leading to dryness or cracking. Maintain the glove at room temperature, approximately 68°F to 72°F (20°C to 22°C). A ventilated area aids in the even distribution of air around the glove, promoting effective absorption without compromising the leather’s integrity.
Duration for Effective Absorption
The absorption process varies by the type of conditioner and glove leather, but generally, a period of 24 hours suffices for thorough absorption. This duration allows the conditioner to deeply penetrate the leather, enhancing its elasticity and durability. It is essential to resist the urge to use the glove during this period. Allowing the glove enough time ensures that it completely absorbs the conditioner, setting the stage for optimal performance and longevity.
Breaking In the Glove After Conditioning
Once you have allowed your baseball glove to absorb the conditioner for 24 hours, the next step involves breaking it in for optimal flexibility and fit.
Playing Catch
Playing catch proves effective in breaking in your baseball glove naturally. Engage in tossing a baseball for at least 30 minutes daily. Through the repeated catching and throwing motions, the glove begins to form to the shape of your hand and the ball. Ensure the throws vary in strength and angle to work the glove evenly across all areas.
Using a Mallet
Employ a baseball glove mallet to simulate the impact of a baseball. Strike the glove’s pocket multiple times to soften and shape the leather effectively. Focus the mallet’s impact on the palm area and along the fingers. For consistent results, combine mallet use with playing catch, dedicating 15-20 minutes per session to mallet work.
Alternative Breaking In Techniques
Several techniques can accelerate the breaking-in process:
- Steam Treatment: Expose the glove to steam for about five minutes to make the leather more pliable. After steaming, wear the glove and work it with your hands.
- Glove Wrapping: After playing catch, place a baseball in the glove’s pocket, and secure it tightly with a band or string overnight. This method helps maintain the desired pocket shape.
- Oven Method: Preheat an oven to 120 degrees Fahrenheit, and place the glove inside for a few minutes. Remove it when slightly warm and work it with your hands. Caution: Overheating can damage the leather.
Implement these methods judiciously to ensure the glove retains its quality and durability, complementing the effect of conditioning.
Maintenance Tips
Proper maintenance ensures your baseball glove remains in top condition, extending its usability and performance. Follow these essential tips to keep your glove game-ready.
Regular Cleaning Schedule
Establish a routine cleaning schedule for your baseball glove to prevent dirt and grime from building up, which can degrade the leather over time. Cleaning after every use maximizes the longevity and performance of your glove. Begin by wiping down the glove with a damp cloth to remove loose dirt. Employ a soft-bristled brush for stubborn stains. For a thorough clean, apply a leather-safe cleaner once every month, focusing on areas that accumulate the most sweat and dirt, such as the palm and webbing.
When to Reapply Conditioner
Reapply conditioner to your baseball glove every 6 months to maintain optimal moisture and prevent the leather from becoming brittle. Monitor the glove’s condition and adjust the frequency if you play in harsh or wet conditions, where reapplication might be needed more frequently. After heavy use seasons, or if the leather starts to feel dry or stiff, conditioning it becomes imperative to restore its softness and prevent cracking.
Troubleshooting Common Issues
In maintaining your baseball glove’s performance, you might encounter a few common issues. Addressing these effectively ensures your glove remains in optimal condition for game play.
What to Do If the Glove Feels Sticky
If your glove feels sticky, clean it using a soft cloth dampened with a mild soap solution. Rub the sticky areas gently to remove excess conditioner or dirt particles, industries like baseball often face this problem due to over-application of conditioning products. After cleaning, allow your glove to air dry in a cool, shaded area. Applying a small amount of talcum powder can help absorb any residual stickiness. Test initially on a small, inconspicuous area to ensure it does not discolor the leather.
Fixing Over-Conditioned Areas
Fix over-conditioned areas by absorbing the excess oils. Blot the area with a clean, dry cloth to soak up as much conditioner as possible. If the leather still feels overly soft or slick, consider applying a bit of rubbing alcohol with a cotton ball on these spots, which can help remove some of the oiliness. Allow the glove to dry naturally, away from direct sunlight and heat sources to avoid leather damage. Reassess the condition and repeat the process if necessary until the desired texture is restored.
Conclusion
Taking the time to condition your baseball glove properly ensures it performs at its best and lasts through many seasons. By following the steps outlined for conditioning and maintenance you’re setting yourself up for success on the field. Remember to be patient with the break-in process; it’s essential for achieving the perfect fit and feel. Regular upkeep not only keeps your glove in top shape but also prevents future complications. Embrace the routine and your glove will be a reliable partner in all your baseball endeavors.